
First, be sure you have your badges ready. One resource is the Badge Gallery on this site, which features the 2017 iREAD badges and examples from 2016. Download or create the badges you want to use and then proceed to the next step.
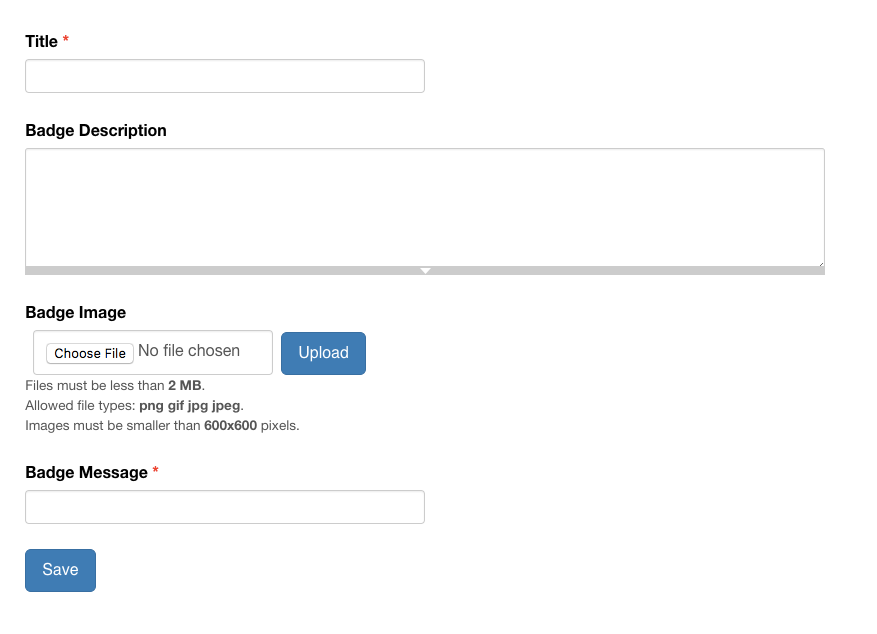
From the Setup menu, select Badges. Click the Add Badge button. Enter a Title, Badge description (optional), click Choose File and Upload your image, and Enter a Badge Message. Click SAVE!
Please note: Files must be less than 2 MB. Allowed file types: png gif jpg jpeg. Images must be smaller than 600x600 pixels. Be sure to check out the Badge Gallery.
Note: You can also upload via spreadsheet. Please note: Any badge images that you wish to import must be on a publicly available website that your app can access. See the badge import example spreadsheet for more details.
Deleting a Badge
We hide the Delete capability to make it harder for Badges to be accidentally deleted.
To delete a Badge, you must login with your admin account. Then visit:
https://YOURSITE.bookpoints.org/admin/structure/entity-type/badge/badge
This page lists all of your Badges. This page has tabs at the top, including "EDIT" and "DELETE" -- do NOT click these tabs. Do NOT click the CAPITAL "EDIT" or "DELETE" tabs.
Instead, look in the list -- each row has a lowercase "edit" and "delete" link for each individual badge. Use THESE "delete" links to delete a badge.
